10 Must-Have Tools Under $50

So you're cooking more plant-based dishes at home. That's awesome! High five 🙌
You may find, as you adapt your cooking practices to include more healthy vegan meals, that you could use a few new kitchen tools to make things easier.
So here's a list of 10 inexpensive tools that get a lot of use in my plant-based kitchen, and that I highly recommend for just about anyone who cooks their own meals at home on the regular.
Having the proper equipment at your fingertips can bring more joy and ease to your time in the kitchen.
And if you can make it simpler and more enjoyable to prepare delicious plant-based meals for yourself and your family, you're probably more likely to continue doing it.
It's a win for both your health and for your happiness factor!
Note: Some of the links in this article are referral links, which means if you make a purchase through them, I'll earn a very small commission at no additional cost to you. I appreciate your support very much. Prices listed were accurate as of the time of publication of this article, but may vary slightly over time.
Inexpensive Must-Haves for Your Plant-Based Kitchen
1. Oxo Salad Spinner - $49.99 for version with stainless steel bowl
Salad is one of my favorite meals, no joke. That's because I make them large, and pack them full of yummy ingredients. Check out my article, 8 Tips for Delicious Dinner Salads for inspiration.
One of the tools that I wouldn't want to be without, is my salad spinner. It makes washing the greens a breeze, and then dries them so that the dressing sticks well to the leaves and the salad doesn't get soggy.
If I were buying one today, I'd choose this stainless steel model pictured here, because the bowl can easily double as a pretty serving or mixing bowl.
2. Epicurean Cutting Board - $24.64 for one 14.5" x 11.25" board

I love these cutting boards. I've had mine for years, and they hold up well over time, even with daily use. They're made of a paper composite material, which makes them durable, knife-friendly, and lightweight. Surprisingly, you can even run them through the dishwasher.

Pro tip: Get a few different sizes and/or colors and use them for different food categories. For example, in my kitchen, the nutmeg boards is for veggies, and the black one is for fruit.
3. Silicone Baking Cups - $10.39 for pack of 12 square cups
While I tend to prefer parchment cupcake liners for baking a batch of muffins, simply for convenience purposes, I do get a lot of use out of my silicone baking cups for freezing batch-prepared ingredients.
For example, I regularly make a large batch of non-dairy pesto and freeze it in ¼ cup portions to defrost later as I need it. I do the same with pumpkin puree, which I make from scratch using fresh pumpkins while they're in season.

Sometimes I save the liquid from canned chickpeas (aquafaba) to use later in baked goods, and freeze that in small portions like this.
And if I run out of time to use all my plant-based milk, in particular coconut milk, which can be hard to use up in time after opening a whole can, I'll freeze that in these silicone cups, too.
The beauty of doing this is, once the food is frozen, you can remove the silicone cups and wash them for another use, and meanwhile transfer your frozen food cubes to another freezer-safe container.
In other words, you don't need to leave the silicone liners on the food for the entire time you store it in the freezer -- just for the first 12 hours or so, until it's frozen.
They come right off, and you can wash them in the dishwasher.
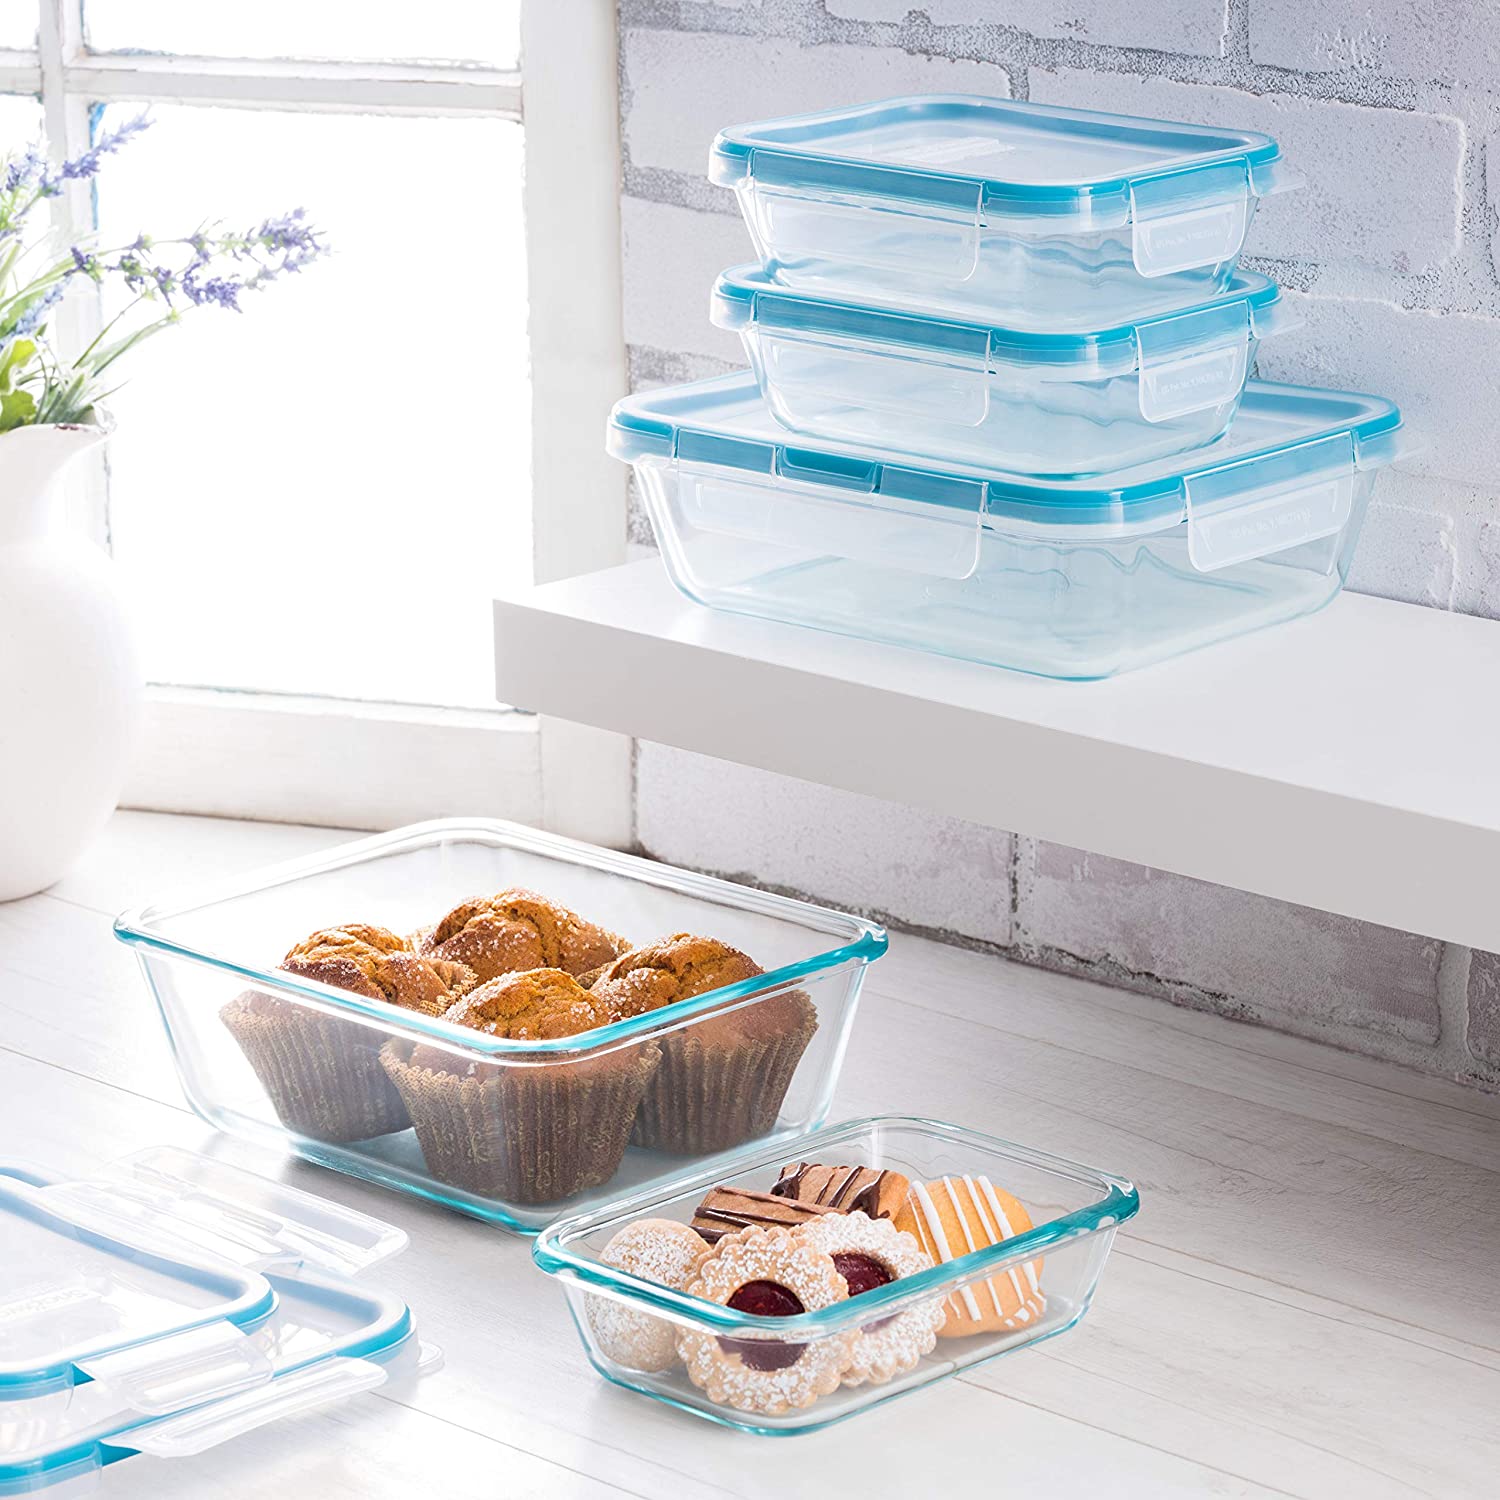
4. Snapware Glass Storage Container Set - $45.99 for 16-piece set (including lids)
Anytime you can replace the plastic in your home with glass, it's a good idea to do so. I feel much better about storing my leftovers in glass food containers, so that there are no plastic chemicals leaching into my food over time.
Pyrex glass in particular is very sturdy. And even the plastic lids of these containers go safely into the top rack of the dishwasher, making them a breeze to clean.
With their lids on, the boxes stack very neatly in the fridge. And in your cabinet, identical lids lock together, making it simple to keep like lids all in the same place.
Having a better organized fridge and cabinets just makes life easier, doesn't it?
If you happen to be a Costco member, check there for these containers, too. Costco often has an even better deal on a set than Amazon does, such as this one.
5. Silicone Garlic Peeler - $4.49
Peeling fresh garlic can be a tedious task. Sometimes that paper-like skin can be such a pain to remove, leaving bits of garlic under your fingernails and odors on your hands.
Enter this ultra-simple tube of silicone. Place your garlic clove into the tube, press down on the tube against your work surface, and roll the tube back and forth.
The friction between the silicone and the garlic removes the skin quickly and easily, and your garlic clove rolls out of the tube cleanly peeled.
6. NutriBullet small kitchen blender - $49.88 for 6 piece set
I have a high-powered Vitamix blender for larger tasks, which I love and use daily, but my smaller NutriBullet blender gets almost-daily use here, too.
It's perfect for small tasks when your larger blender is impractical -- things like grinding a tablespoon of flaxseed into flaxseed meal for baking, or blending a can of coconut milk that had separated while in storage.
I use my NutriBullet to whip up a quick curry sauce, miso broth, or salad dressing, and to quickly blend a single-serving smoothie or my favorite blended coffee treat, Blended Vanilla Almond Iced Mocha.
It's a small investment that offers huge convenience. Another perk: It packs easily in the car for a road trip if you want to make your own smoothies while away on vacation.
7. Enameled Cast Iron Dutch Oven - $46.49 for 6-qt dutch oven
I'm very often asked what cookware I recommend, especially when people find out their old Teflon non-stick pots and pans may be putting toxic chemicals into their food. Yuck!
For anyone looking for just one inexpensive pot to cook most soups and one-pot meals, an enameled cast iron dutch oven like this one has to be my favorite go-to piece of cookware.
You can use it on your stovetop and in the oven, and it transfers nicely to the table -- it's a beautiful piece for serving, too.
One drawback is that it's a bit heavy, but unlike regular cast iron, the enamel coated surface means it's very low maintenance - a quick hand wash and air dry after use is all it takes to clean it. No "seasoning" necessary.
And your dutch oven is so durable, it should last you a very long time.
8. Pint-and-a-Half Ball Jars - $42.50 for a pack of nine 24-ounce jars
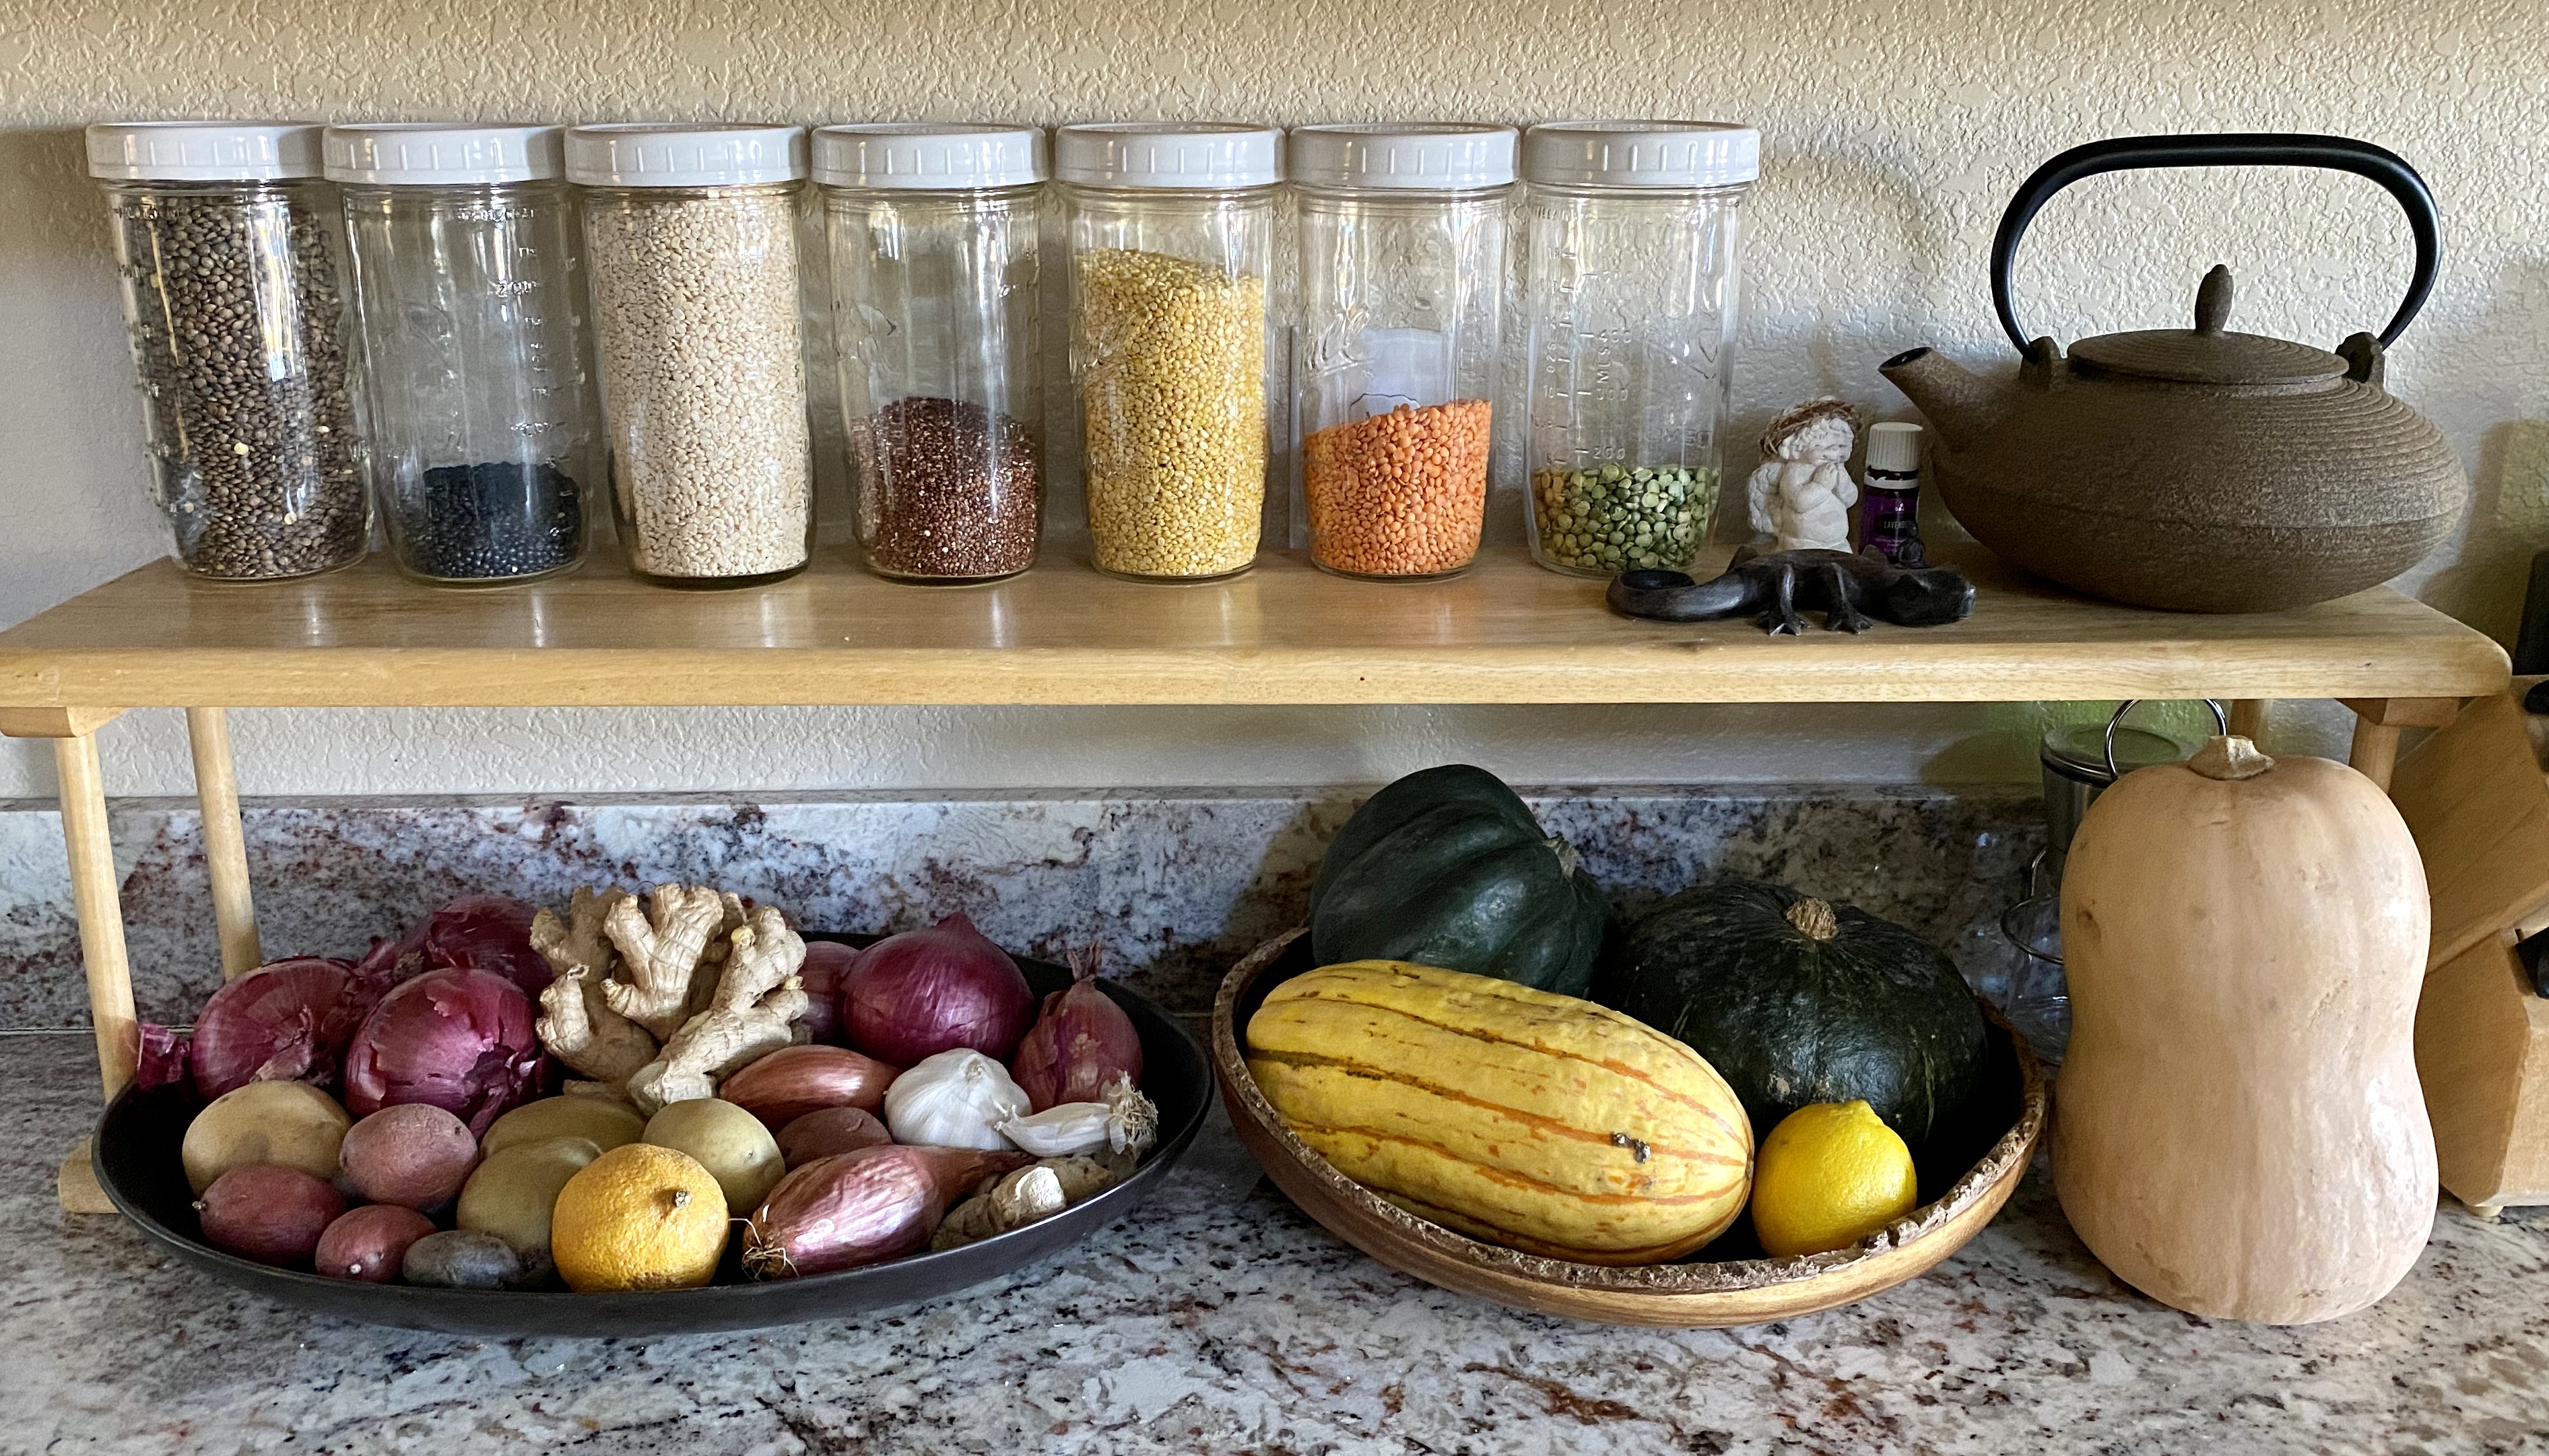
I use my pint-and-a-half Ball jars (a.k.a. Mason jars) for so many things -- from storing and organizing dry goods in my pantry, to food storage in the fridge or freezer, to drinking glasses.
They're sturdy, versatile and pretty. For example, I love storing my most colorful lentils on display on my kitchen counter in these jars, simply because they're lovely to look at.

Take a look at your local supermarket, too, because you may be able to find a better price on these canning jars in person, where there's no shipping cost for a heavy box built into the price.
Tip: The metal canning lids and rings that come with these jars will eventually begin to rust as you wash and reuse them over time. You can pick up a package of hard plastic lids in the "wide mouth" size, as I've done, to make them easier to wash and reuse. (They're prettier than the metal, too!)
9. Silicone Cooking Utensils - $22.99 for a set of 8 tools with acacia wood handles
My silicone utensils are my absolute favorite tools for stirring, scooping and flipping. The silicone is heat proof, and it's soft, so you don't have to worry about melting your tools or scratching your cookware.
The set pictured has acacia wood handles, which are beautiful and feel nice in the hand. However, if you choose this set, I highly recommend hand washing rather than putting them in the dishwasher, because the dishwasher will quickly dry out and damage the wood.
If you need a set you feel comfortable throwing in the dishwasher, choose silicone utensils with stainless steel handles instead ($25 for an 11-piece set).
And don't forget an attractive utensil crock to hold all your tools within reach of the stove.
10. Homegrown Microgreens Starter Kit - $49 one-time purchase (or $35 with a monthly seed quilt subscription)
(Use code SUPERGREENS) to save 10%
First of all, what are microgreens? They are the little seedling sprouts of some of your favorite vegetables... kale, broccoli, radishes, cabbage, mustard, salad greens, etc.
Believe it or not, microgreens contain nearly all the nutrients of their full-sized counterparts, concentrated into tiny sprouts.
It's amazing to pop some radish or broccoli sprouts into your mouth, for example, and experience so much of the flavor of their adult counterparts!
When you buy them at the store, microgreens tend to be expensive, and because they're so delicate, they tend to perish quite quickly.
So Hamama has made it super simple to grow your own at home. All you have to do is soak the pre-seeded coconut-based quilt in water, in the tray provided, for 10 seconds, and then let everything sit for 5-8 days.
You'll need to remove the top layer of paper when the sprouts start to push up on it, but otherwise it's virtually maintenance free.
This way, you can harvest and eat your microgreens while they're ultra-fresh.
I've been putting them on almost everything lately -- as toppings for soups, curries, pasta, and lentil dishes, on Buddha bowls, in sandwiches, salads, on pizza and my avocado toast, even blended into smoothies for an extra nutritious boost.
Given how easy it is to grow them at home, and how much excellent nutrition they add to your diet, purchasing a Hamama microgreens kit (and the optional but recommended monthly seed quilt subscription), is a highly worthwhile investment!
Full details and instructions are available on the Hamama website. Use the promo code SUPERGREENS for an additional 10% discount.
Did you find this list helpful?
I hope this inspired you to up your kitchen tool game, and to make a few small investments so your time in the kitchen can be more enjoyable.
Did I forget your favorite kitchen tool under $50? If so, let me know by sending me a DM on Instagram or Facebook @greensagelife. I'd love to hear from you!


